Integrate a WordPress landing page
Connect your WordPress site to RoyLead with the plugin — install it, enter the API Key, add the form shortcode and start collecting clicks and leads.
Updated on June 8, 2026
If your landing pages are on WordPress, you don't have to touch any code: you install the RoyLead Connector plugin, enter your API Key and add a shortcode to the page. From there, the form, the clicks and the leads are handled automatically.
💡 Unlike HTML landings, on WordPress you don't need to verify a domain in RoyLead: the site already uses its own. The plugin takes care of everything.
Download and install the plugin
Go to the Plugin page and download the latest version of the plugin (a .zip file).
Then, in your WordPress dashboard: Plugins → Add new → Upload plugin → choose the .zip → Install → Activate.
Enter your API Key
In RoyLead go to Settings → API and generate (or regenerate) your API Key, then copy it.
🔒 The key is shown only once: copy it right away. It identifies your account — don't share it.
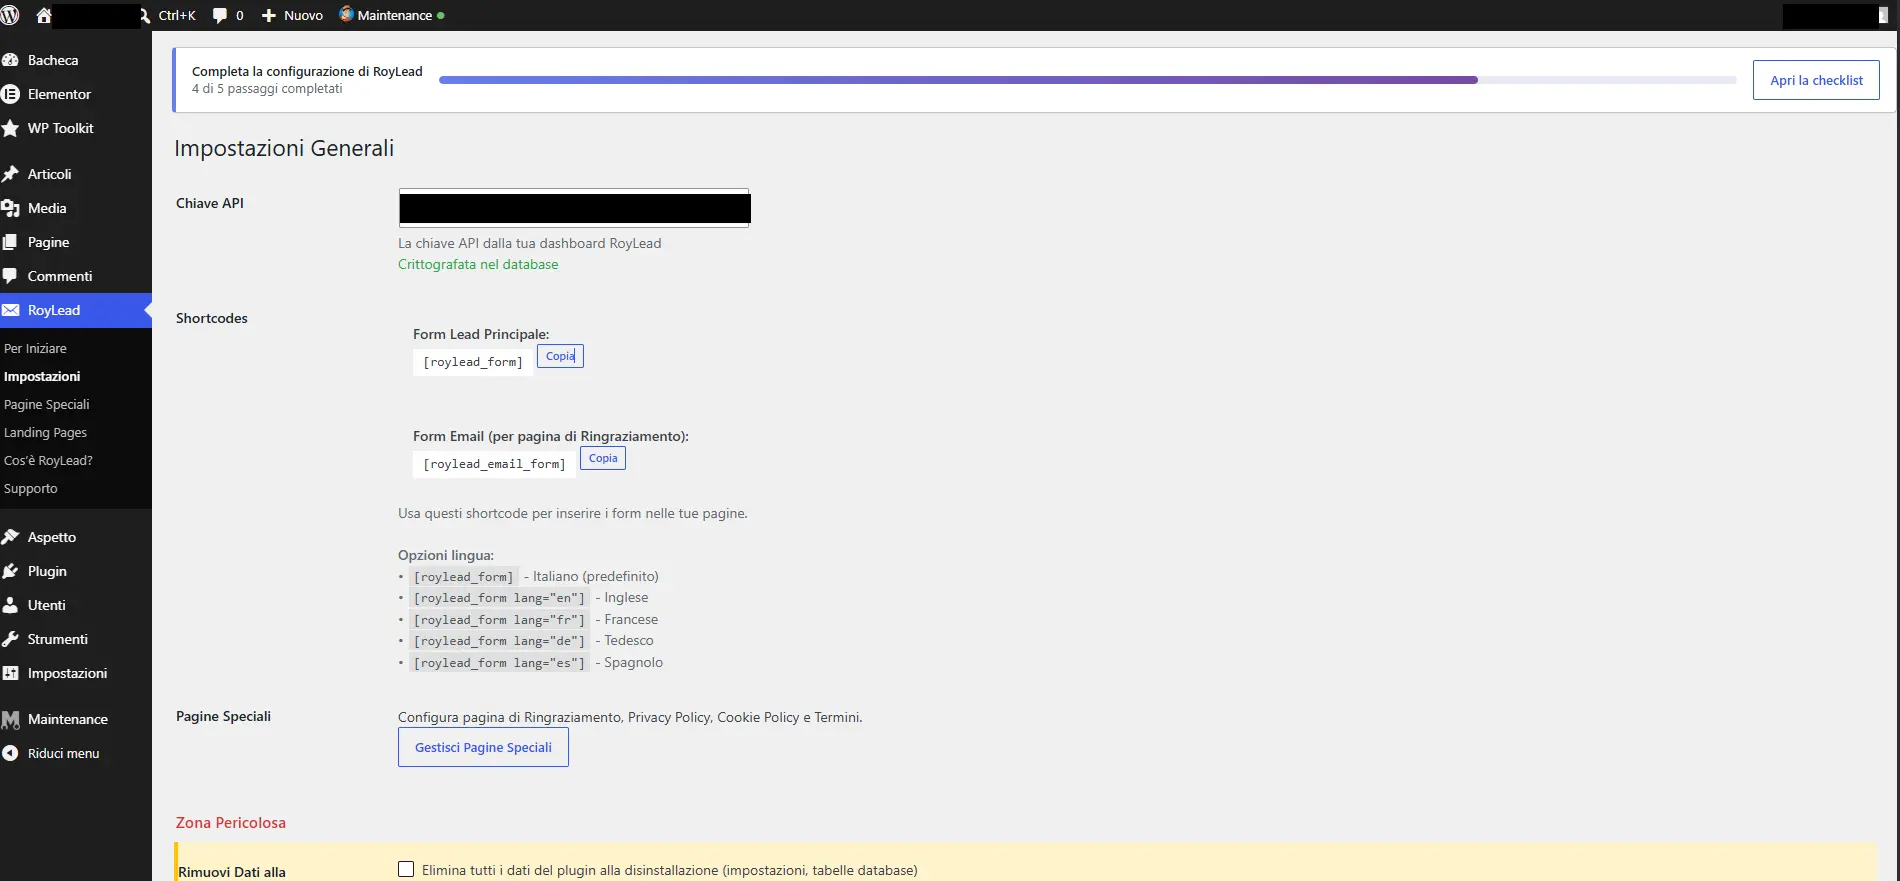
In WordPress go to RoyLead → Settings, paste the key into the API Key field and save. If it's correct you'll see the confirmation (the key is encrypted in the database).
Set the thank-you page (required)
Still in RoyLead → Settings → Special pages:
- Thank You Page (required): the page the user is redirected to after submitting the form. Create a "Thank you" page and select it here.
- Privacy Policy (recommended): if you set it, the form will show the consent checkbox linking to that page (useful for GDPR).
⚠️ Without the Thank You Page the plugin shows a warning: set it before going live.
Add the form to your landing
Open the WordPress page you want to use as a landing and insert the shortcode:
[roylead_form]
That's all: the form (first name, last name, phone, address…) is generated and styled by the tracker, with phone validation and anti-spam already included. Want the form in another language? Use [roylead_form lang="en"].
Sync the page
Go to RoyLead → Landing Pages, tick the page you just created and press Sync (published pages also sync on their own when saved).
💡 Syncing links the WordPress page to your landing in RoyLead, so clicks and leads are attributed correctly.
Customize the form colors
Form colors are set inside RoyLead, with color pickers and a live preview. There are two levels:
- Per domain — go to Domains, on your domain click the palette icon («Form colors»): they apply to all landings served on that domain.
- Per single landing — go to Landing Pages, on the landing click the palette icon: they override the domain only for that landing.
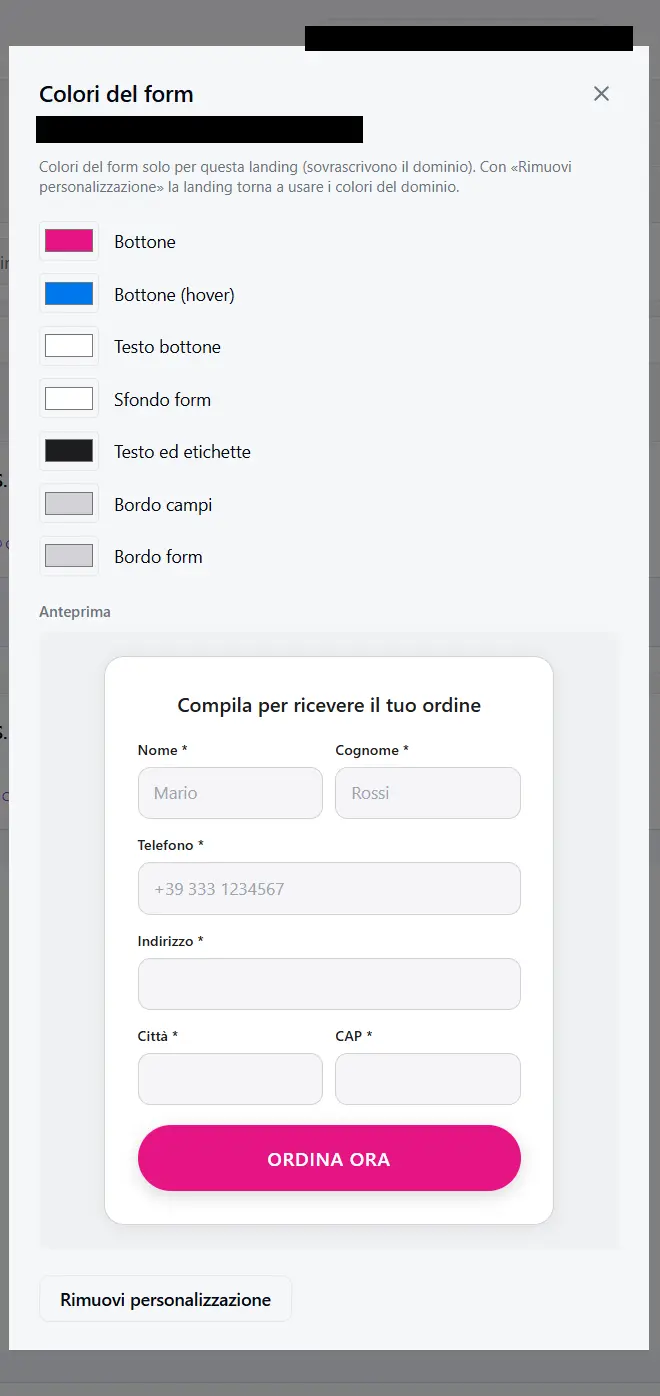
💡 Priority: landing colors → domain colors → default palette. The same form everywhere, with your palette.
Publish and verify
Publish the page and open it from your site. To test tracking, add a parameter to the URL, e.g.:
https://yoursite.com/landing?fbclid=test123&utm_source=facebook
- The click is tracked on its own when the page loads (
fbclid,gclid,utm_*, pixel cookies… read automatically). - Fill in and submit the form: the lead will appear in the Leads section, and the user will land on the Thank You Page.
💡 If the lead arrives with the campaign parameters, the integration is complete.
Extra (optional) — Capture the email on the thank-you page
Want to collect the email too, after the lead? On your Thank You Page add the shortcode:
[roylead_email_form]
A small email form will appear: the user enters it and it's added to their lead.
Troubleshooting
- The form doesn't appear / "Form not available" → the API Key isn't set or isn't valid (RoyLead → Settings). Check you copied it in full.
- The lead doesn't arrive → make sure the
[roylead_form]shortcode is on the page and that the page is synced (Step 5). - I'm not redirected after submitting → the Thank You Page isn't set (Step 3).
- The colors don't change → save again in Form Appearance and reload the page (you may have site caching enabled).
Ready to put this into practice?
Create your RoyLead account and start in minutes.