Connect an external network offer
Save the network credentials, create the offer in Offers, and link it to your landing pages to forward leads automatically.
Updated on June 9, 2026
Connecting an external network offer (e.g. Worldfilia, Flamyfox, Nutrafilia) tells RoyLead who to deliver the leads to that you collect on your landing pages. Once connected, every valid lead is forwarded to the network automatically, and status updates (approved / cancelled / duplicate) flow back on their own.
💡 The full loop is always the same, whatever the network: 1) save the network credentials → 2) create the offer → 3) link it to your landing pages. Only the field names change, not the logic.
Before you start
From the panel of the network you work with, you'll need:
- The network's API credentials (in their panel, usually under "API" or "Integrations").
- The offer codes for the offer you want to promote (offer code, landing code, offer ID… depends on the network).
- The offer URL (the offer's page on the network).
Each network uses different names for the same things. Here's the map for the three most common ones:
| Network | Credentials (in Settings) | Offer data (in the form) |
|---|---|---|
| Flamyfox | Email + API Key | Offer ID |
| Worldfilia | API Key + Source ID | Offer API URL |
| Nutrafilia / Adrice | UID + Key | Offer code + Landing code |
📌 Not sure where to get these values? They're provided by the network, not by RoyLead. If you can't find them, ask your network contact.
Save the network credentials
Go to Settings → Network Credentials. There's a card for each network: fill in the fields for the right network (e.g. API Key and Source ID for Worldfilia) and press Save Credentials. When done, a green Credentials saved badge appears.
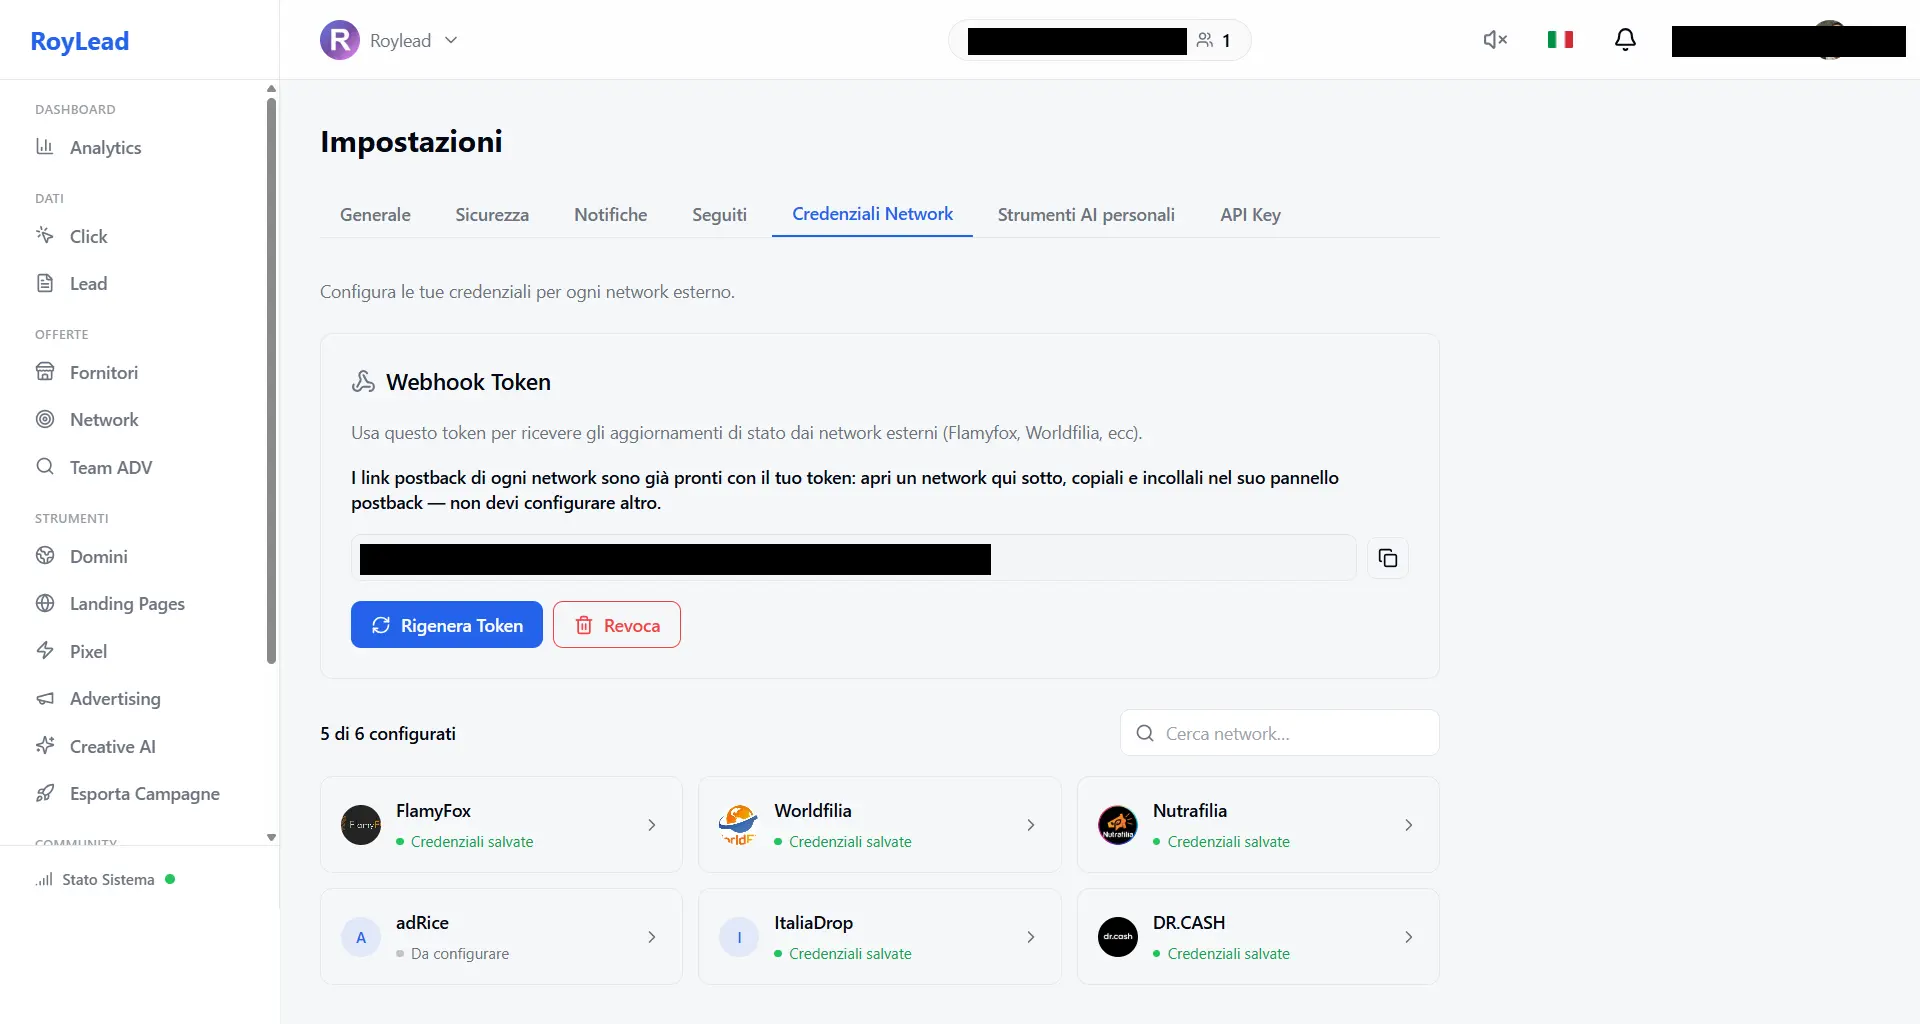
🔒 Credentials are saved per team and only visible to those with permission. You set them once: every offer on that network reuses them.
(Recommended) Enable status postback
Still in Network Credentials, at the top, generate the Webhook Token: it's the key that lets the network notify RoyLead when a lead is approved, cancelled or marked as a duplicate.
- Press Generate token and copy it.
- For each network, copy its callback URLs (under the network's card) and paste them into the network's postback panel — use the «Configure postback» link when available.
💡 Without postback, leads are still forwarded, but their status stays «pending»: you won't automatically know which ones got approved. Worth the two minutes it takes to set up.
Create the offer
Go to Offers and press New Offer.
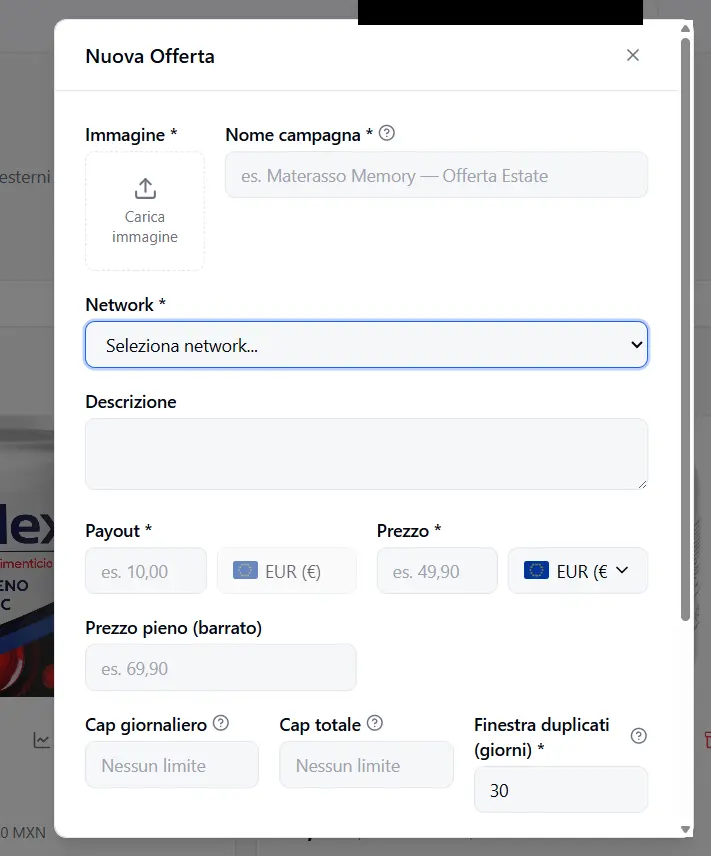
Fill in the form:
- Image and Name — the offer's identity (so you can spot it at a glance).
- Network — pick the network from the dropdown. As soon as you select it, the network-specific fields appear below (the Network Configuration).
- Network Configuration — enter the offer codes from the network here (e.g. Offer code + Landing code for Nutrafilia, Offer ID for Flamyfox). These are the values from the table above.
- Payout (EUR) — how much you earn per valid lead. Always settled in euros.
- Price + Currency — the product price to the customer, in the offer's currency.
- Daily cap / Total cap — optional lead limits (leave empty = no limit).
- Duplicate window (days) — for how many days the same phone/email counts as a duplicate (default 30).
- Target countries — the countries you accept leads from. Leads from other countries are rejected.
- Offer URL — the link to the offer's page on the network.
Press New Offer to save. The offer shows up in the grid.
⚠️ Network, image, payout, price, target countries and URL are required: without them, the save button stays disabled.
Link the offer to landing pages
The offer alone doesn't forward anything yet: it must be linked to the landing pages where you collect leads.
- On the offer card, press the Link to Landing Page icon (the chain 🔗).
- Pick one or more landing pages.
- Confirm.
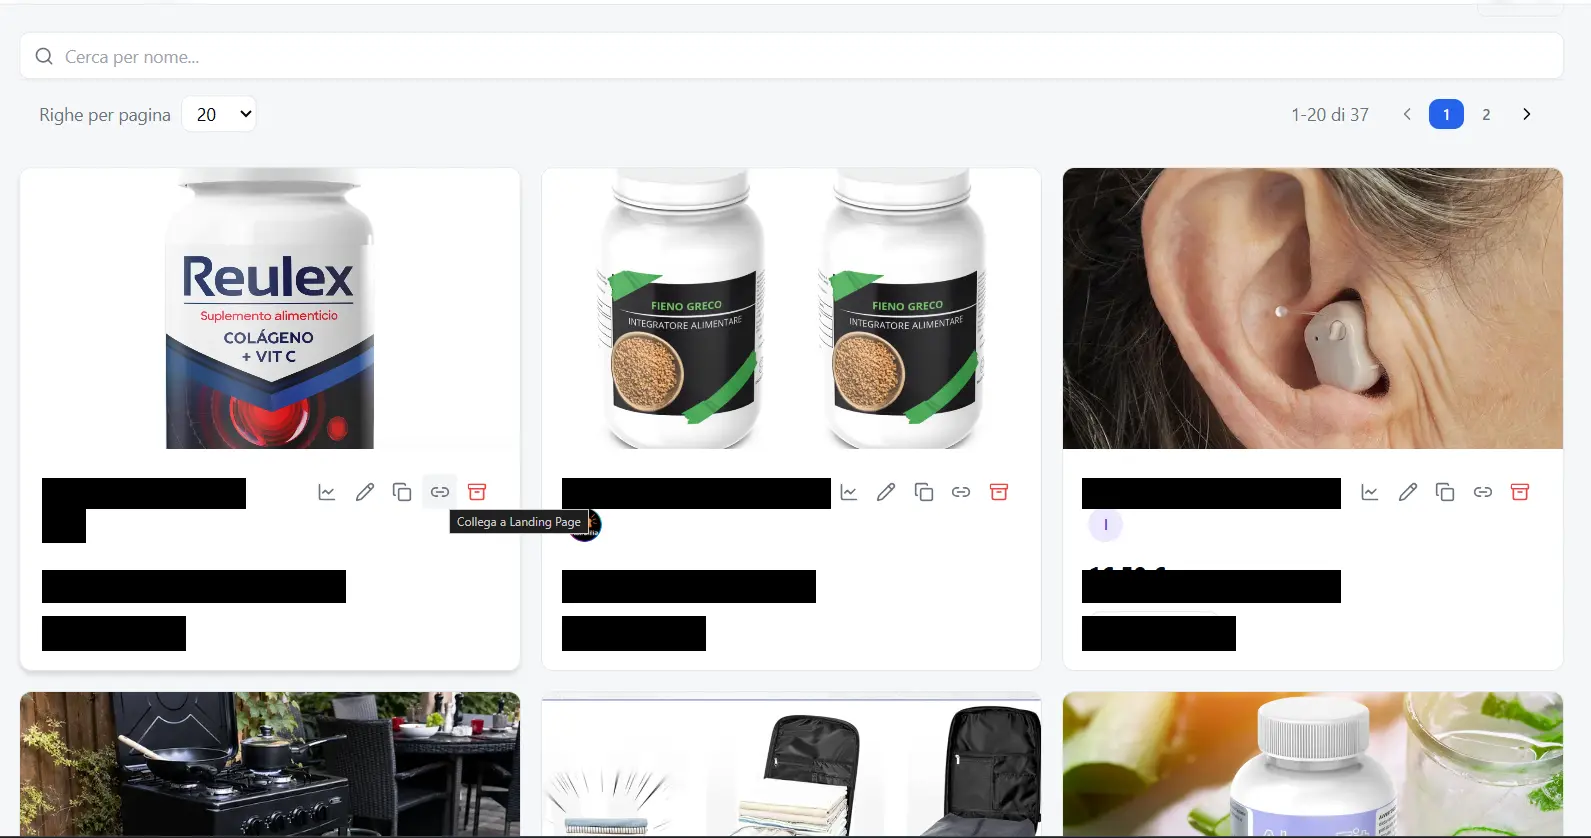
From now on, every lead collected on those landing pages is automatically forwarded to the network, using the credentials from Step 1.
💡 A landing page can be linked to only one offer at a time. If it's already linked elsewhere, unlink it first before relinking.
How to verify it works
- Open the offer detail (click the card): at the bottom you'll see the list of linked landing pages, grouped by domain.
- Collect a test lead from a linked landing and check in Leads that it shows as forwarded to the network.
- If you set up the postback (Step 2), the lead's status will update on its own when the network processes it.
Troubleshooting
| What you see | Cause | Fix |
|---|---|---|
| The «New Offer» button stays greyed out | A required field is missing | Check image, network, payout, price, target countries and URL |
| Leads aren't forwarded | Offer not linked to any landing | Do Step 4 |
| Forwarding fails / lead rejected by network | Wrong credentials or offer codes | Recheck Step 1 (credentials) and the Network Configuration in Step 3 |
| Lead status stays «pending» | Postback not configured | Do Step 2 and paste the callback URLs into the network panel |
| «This landing page is already linked to another offer» | The LP is linked elsewhere | Unlink it from the other offer, then relink it |
📌 Have several offers from the same network? You save the credentials once (Step 1): every new offer on that network reuses them. Just repeat Steps 3 and 4.
Ready to put this into practice?
Create your RoyLead account and start in minutes.