Add a domain to Cloudflare
Bring your domain onto Cloudflare by pointing its nameservers, so you can publish your landing pages on your own address with Workers.
Updated on June 24, 2026
To publish your landing pages on Cloudflare (with Workers), or to use your domain with Cloudflare in general, that domain must be managed by Cloudflare: in practice you point the domain's nameservers to Cloudflare. You do it once, it's free, and it takes just a few minutes.
💡 If your domain is already listed in your Cloudflare account, you're all set: you can skip this guide.
Before you start
You'll need:
- A domain you've already registered (Namecheap, GoDaddy, Aruba, etc.).
- Access to your registrar's panel where you bought it (to change the nameservers).
- A Cloudflare account (free).
💡 Don't have a domain yet? You can register one on Namecheap: Create a domain
Add the domain to Cloudflare
- Go to dash.cloudflare.com and sign in (or sign up, it's free).
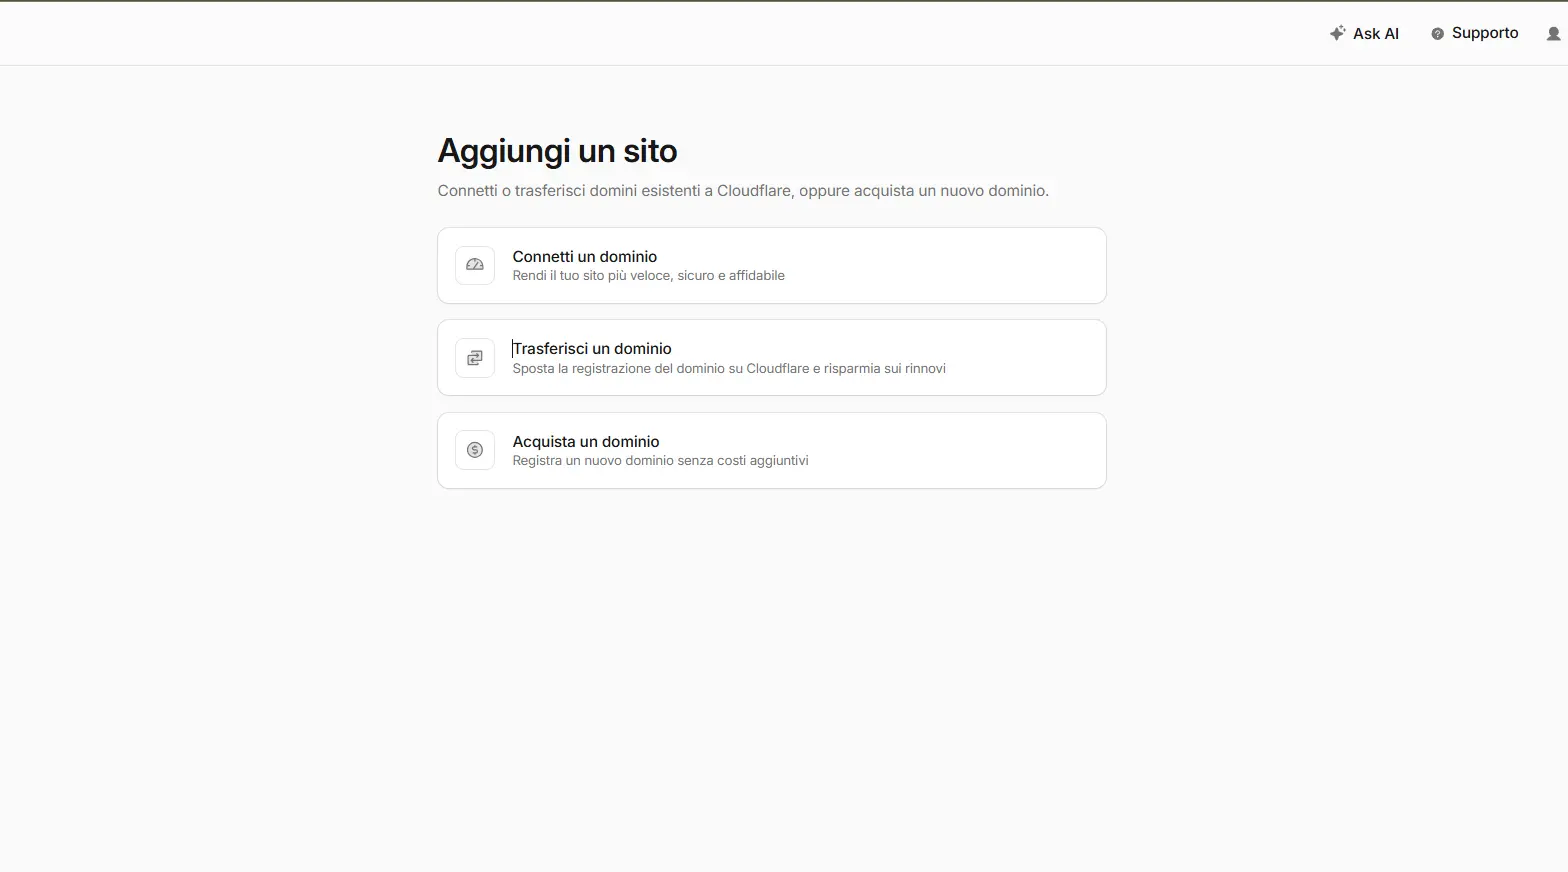
- Click Add a site and choose Connect a domain.
- Type your domain in the format
yourdomain.com— withouthttp://and withoutwww— and continue.
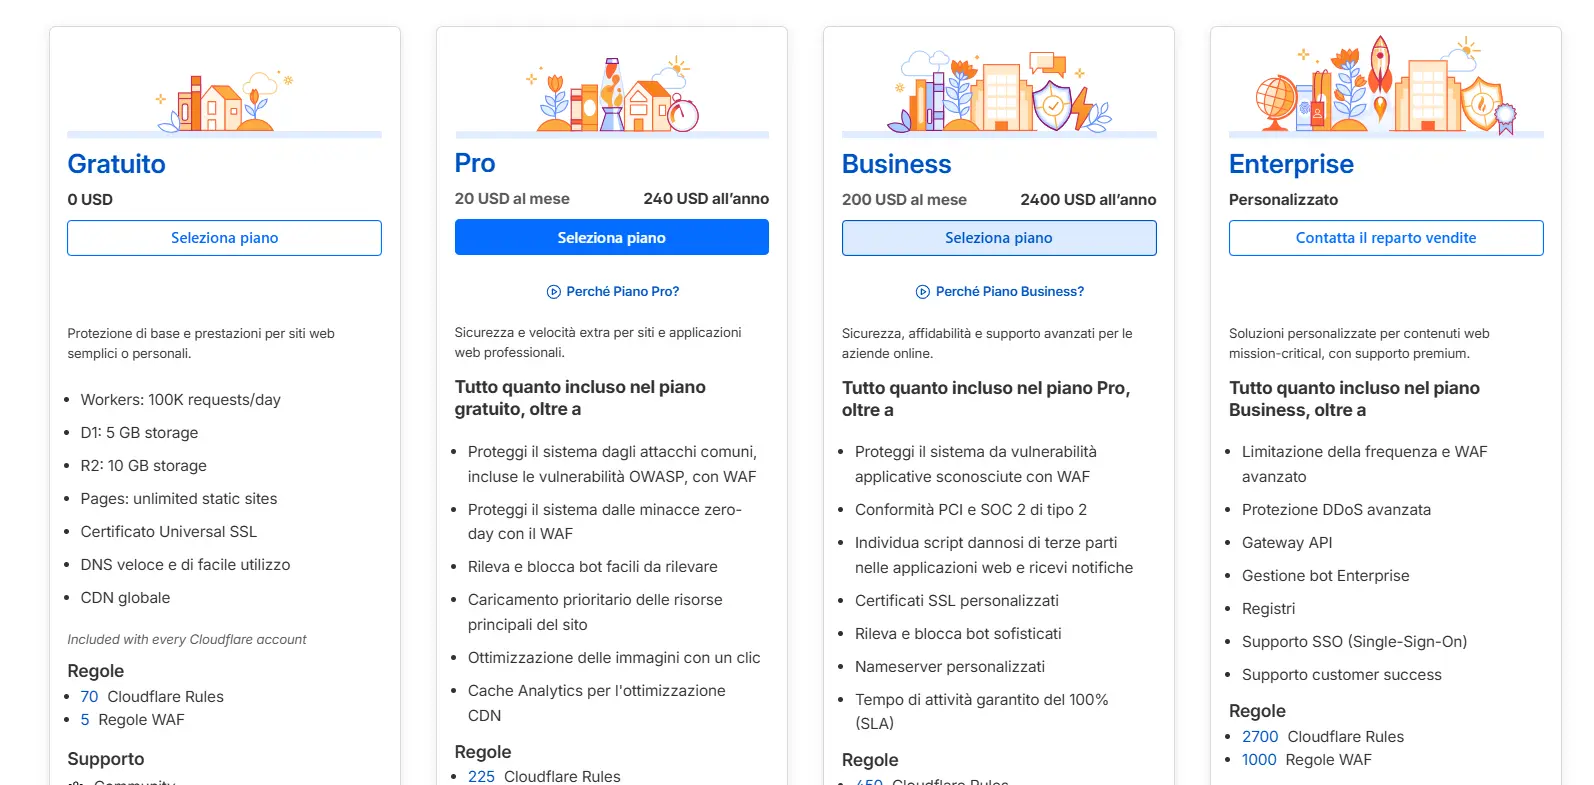
Pick the Free plan
When Cloudflare asks for a plan, choose Free (at the bottom of the list): it's more than enough to serve landing pages. Confirm.
Check the DNS records
Cloudflare scans the domain's existing DNS records and shows them to you. Leave them as they are and click Continue.
⚠️ If you already had a site on that domain, make sure the main records (e.g.
www, mail) are in the list before continuing.
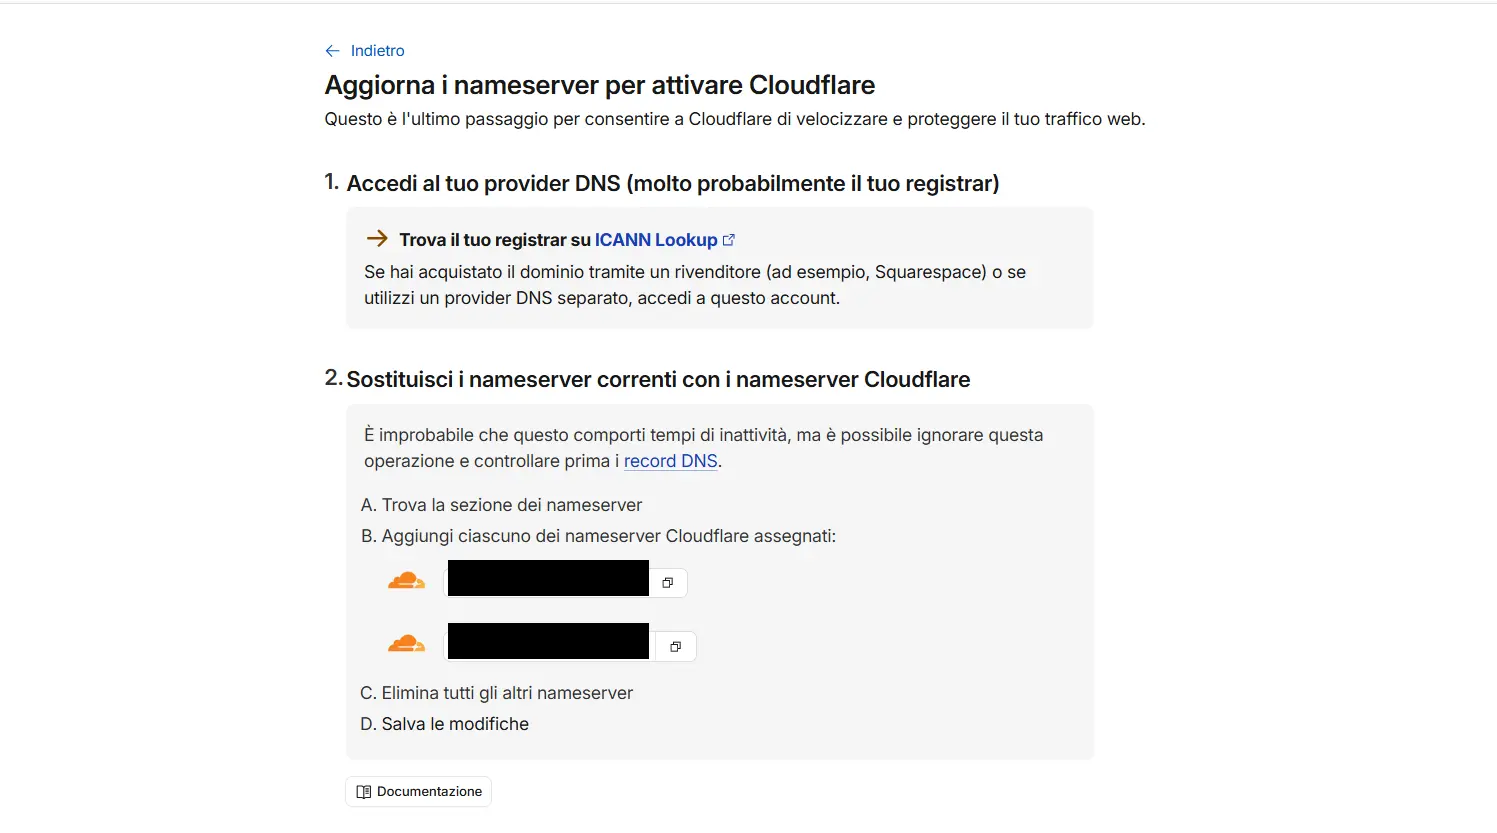
Copy Cloudflare's 2 nameservers
Cloudflare shows you 2 nameservers (something like xxx.ns.cloudflare.com and yyy.ns.cloudflare.com). These are the key piece: they tell the world that Cloudflare now manages the domain.
Change the nameservers at your registrar
- Go to the site where you bought the domain (the registrar).
- Open the domain settings, Nameservers section (sometimes under "DNS" or "Name servers").
- Choose the custom nameservers option (Custom DNS / Custom nameservers).
- Delete the current nameservers and paste Cloudflare's 2 from Step 4.
- Save.
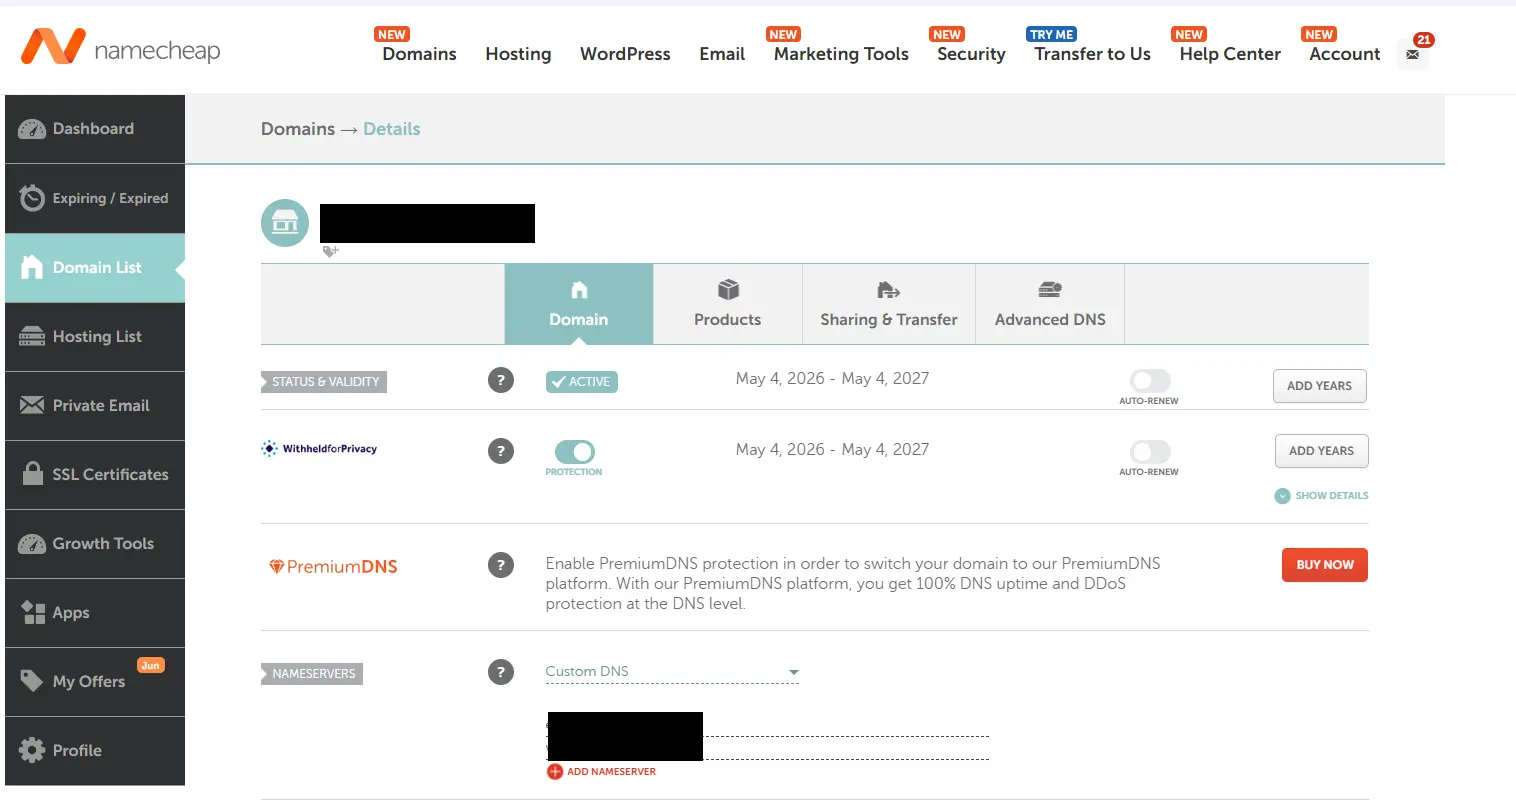
⚠️ Every registrar names this screen slightly differently, but the idea is always the same: replace the nameservers with Cloudflare's.
Wait for the domain to go "Active"
Go back to Cloudflare and click Check nameservers. From here:
- The domain status will switch to Active — usually within minutes, sometimes a few hours.
- You'll get a "Your domain is active" email from Cloudflare.
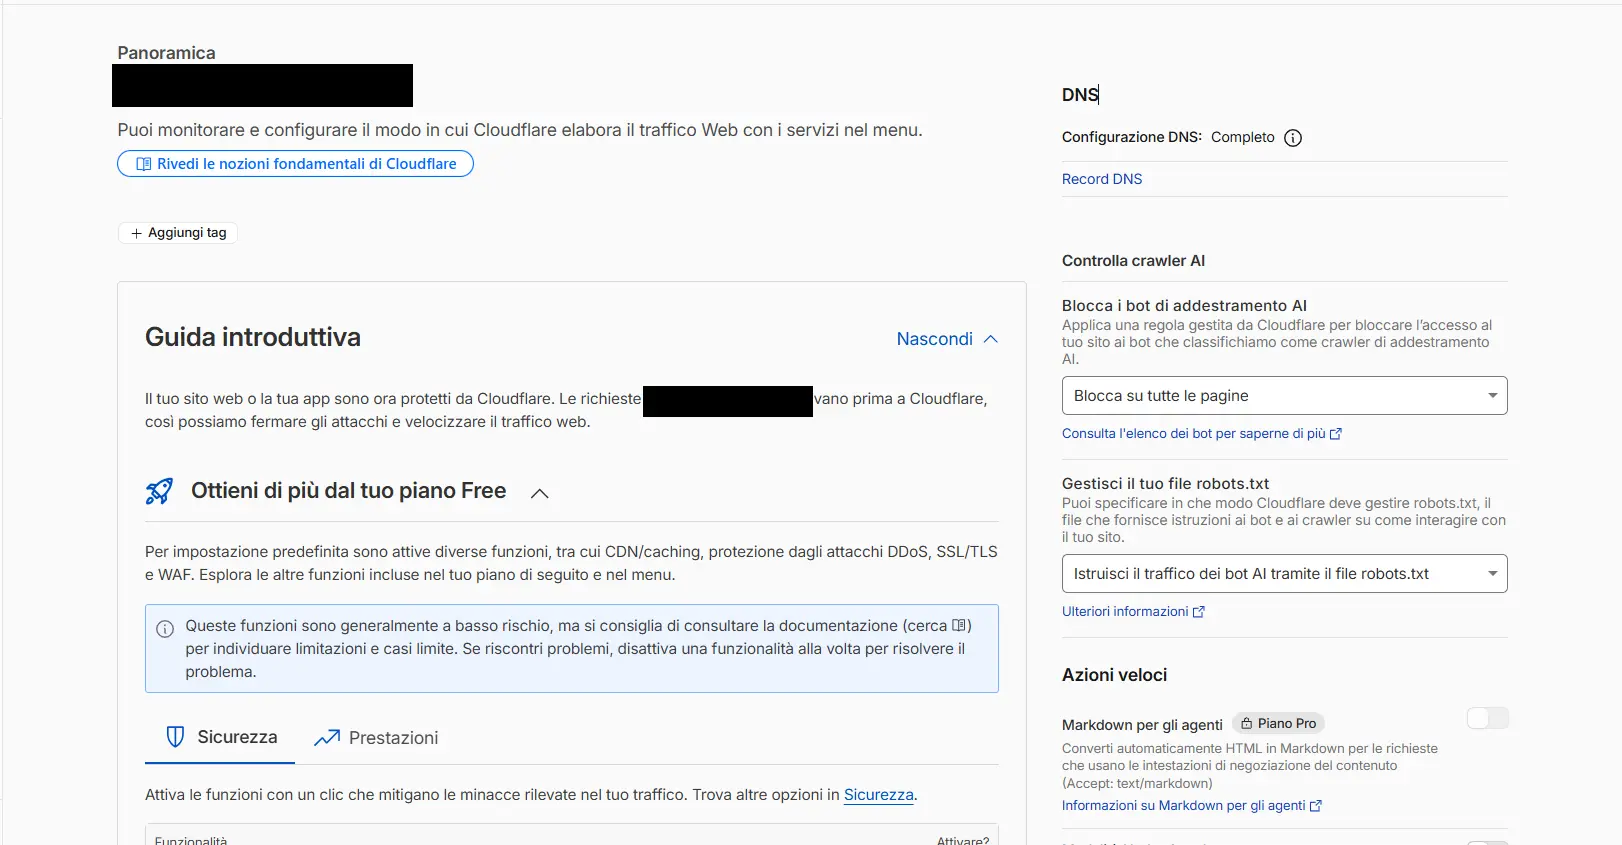
💡 Only once you see Active can you go ahead and publish a landing page. If it stays pending for hours, double-check you saved the right nameservers at the registrar (Step 5).
What's next?
Domain active on Cloudflare? Two steps are left, in this order:
- Connect the domain to RoyLead too (verification + activation), so your leads get attributed: How to connect a new domain ↗
- Publish your landing page on this domain: Publish an HTML landing page on Cloudflare Workers ↗
💡 Handy: the TXT record RoyLead asks for to verify the domain is added straight into Cloudflare's DNS, where you now manage the domain.
Ready to put this into practice?
Create your RoyLead account and start in minutes.