Connect Cloudflare to publish landings
Connect your Cloudflare account to RoyLead in one click (or, alternatively, with an API token) to publish landings on your own domain.
Updated on September 25, 2026
RoyLead publishes your landings to your own Cloudflare account, on your domain (yourdomain.com/path). The easiest way is to connect Cloudflare in one click: no token to create. Nothing leaves your account: RoyLead works with your permission, and you can remove it whenever you want.
First: the domain must be on Cloudflare
To publish on yourdomain.com/..., that domain must be managed by Cloudflare (nameservers pointed to Cloudflare). If it's still on GoDaddy / Namecheap / elsewhere:
- On Cloudflare → Add a site → enter the domain.
- Cloudflare gives you 2 nameservers → go to your registrar (where you bought the domain) and replace the nameservers with Cloudflare's.
- Wait until the status becomes Active (usually minutes/hours).
A domain already on Cloudflare is ready right away.
Connect Cloudflare in one click (recommended)
- In RoyLead go to Settings → Cloudflare and click Connect Cloudflare.
- Cloudflare opens: log in (if you aren't already) and choose the account that holds your domains.
- Review the requested permissions (Workers, DNS, Zone) and click Authorize.
- You're back on RoyLead with the Connected badge (green). Done: go to Publishing.
To disconnect: Settings → Cloudflare → Disconnect, or from your Cloudflare profile, in the list of authorized apps.
Alternatively: the API token
If you'd rather not use the connection, or you already have a token, you can paste an API token with a few permissions (RoyLead derives the Account ID from the token).
1. Create the token (4 permissions)
Quick way: open this link while logged in to Cloudflare: the form opens already filled with the name and the 4 permissions. Scroll down → Continue to summary → Create Token → copy the token and go to step 2. If the link doesn't fill the form, follow the steps below.
-
Go to Cloudflare → API Tokens → Create Token → Create Custom Token.
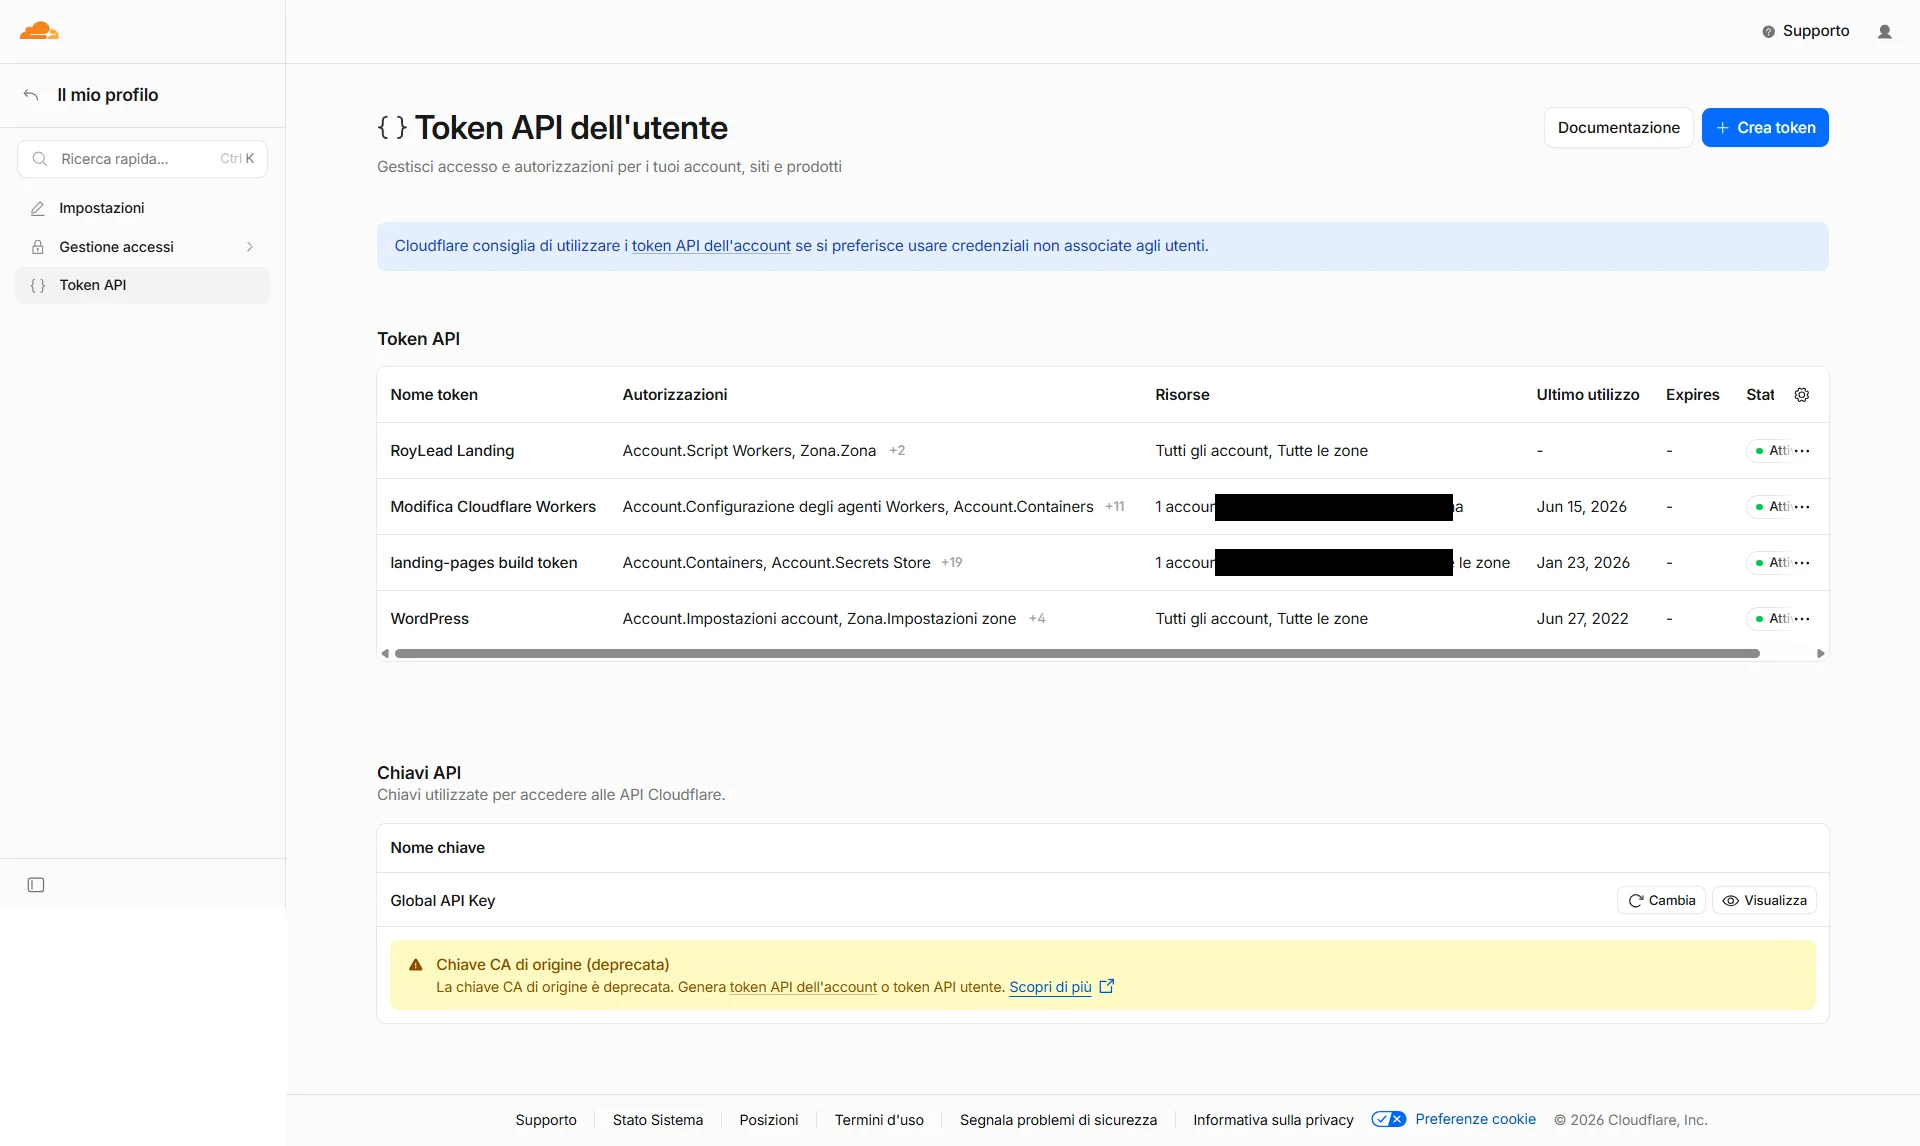
User API Tokens list with the "Create Token" button top-right 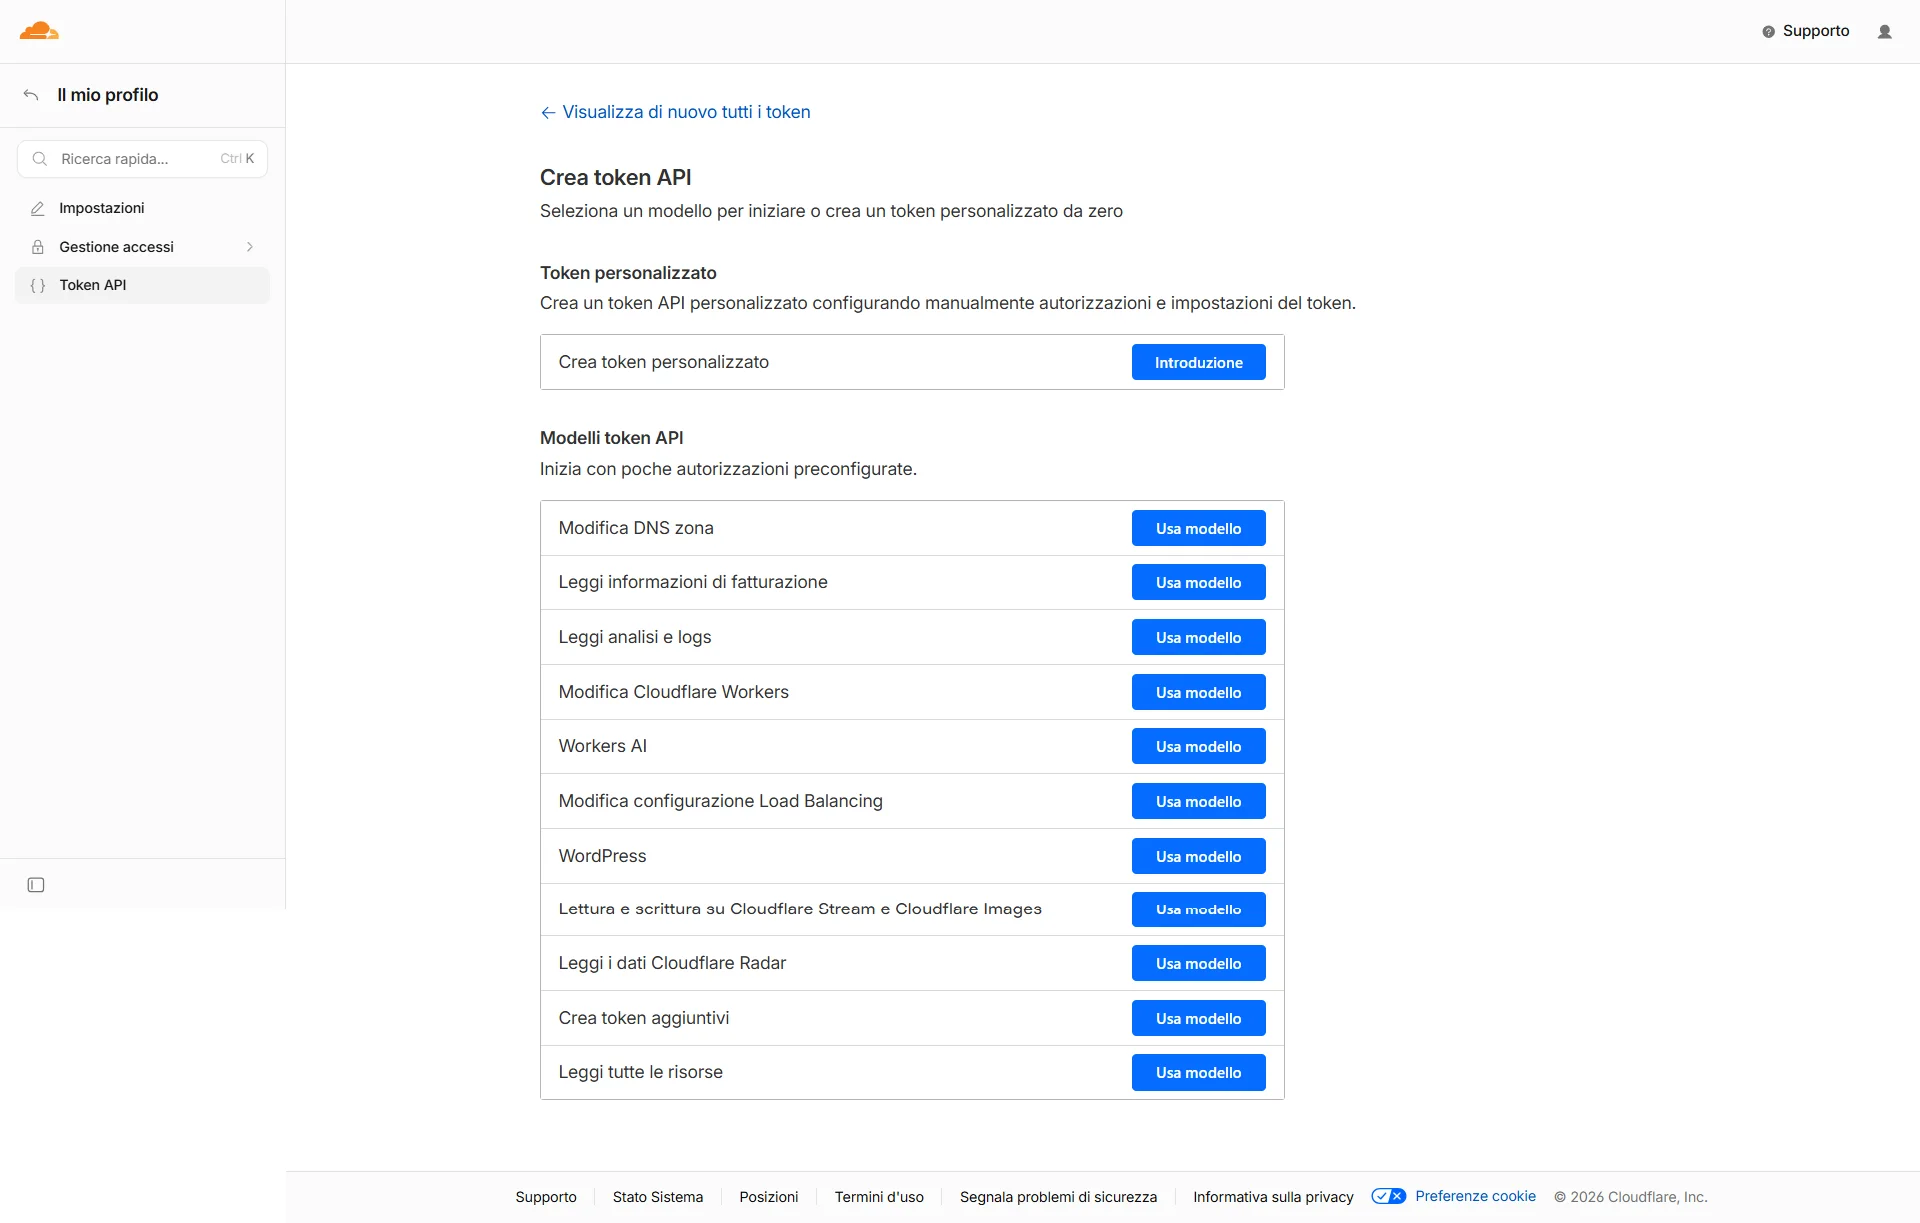
Create API Token page: choose "Create Custom Token" -
Token name: anything (e.g. RoyLead Landing).
-
Permissions — add 4 rows (the "+ Add more" button for each). Each row has 3 menus: type (Account/Zone) · permission · level:
Type Permission Level Account Workers Scripts Edit Zone Workers Routes Edit Zone DNS Edit Zone Zone Read 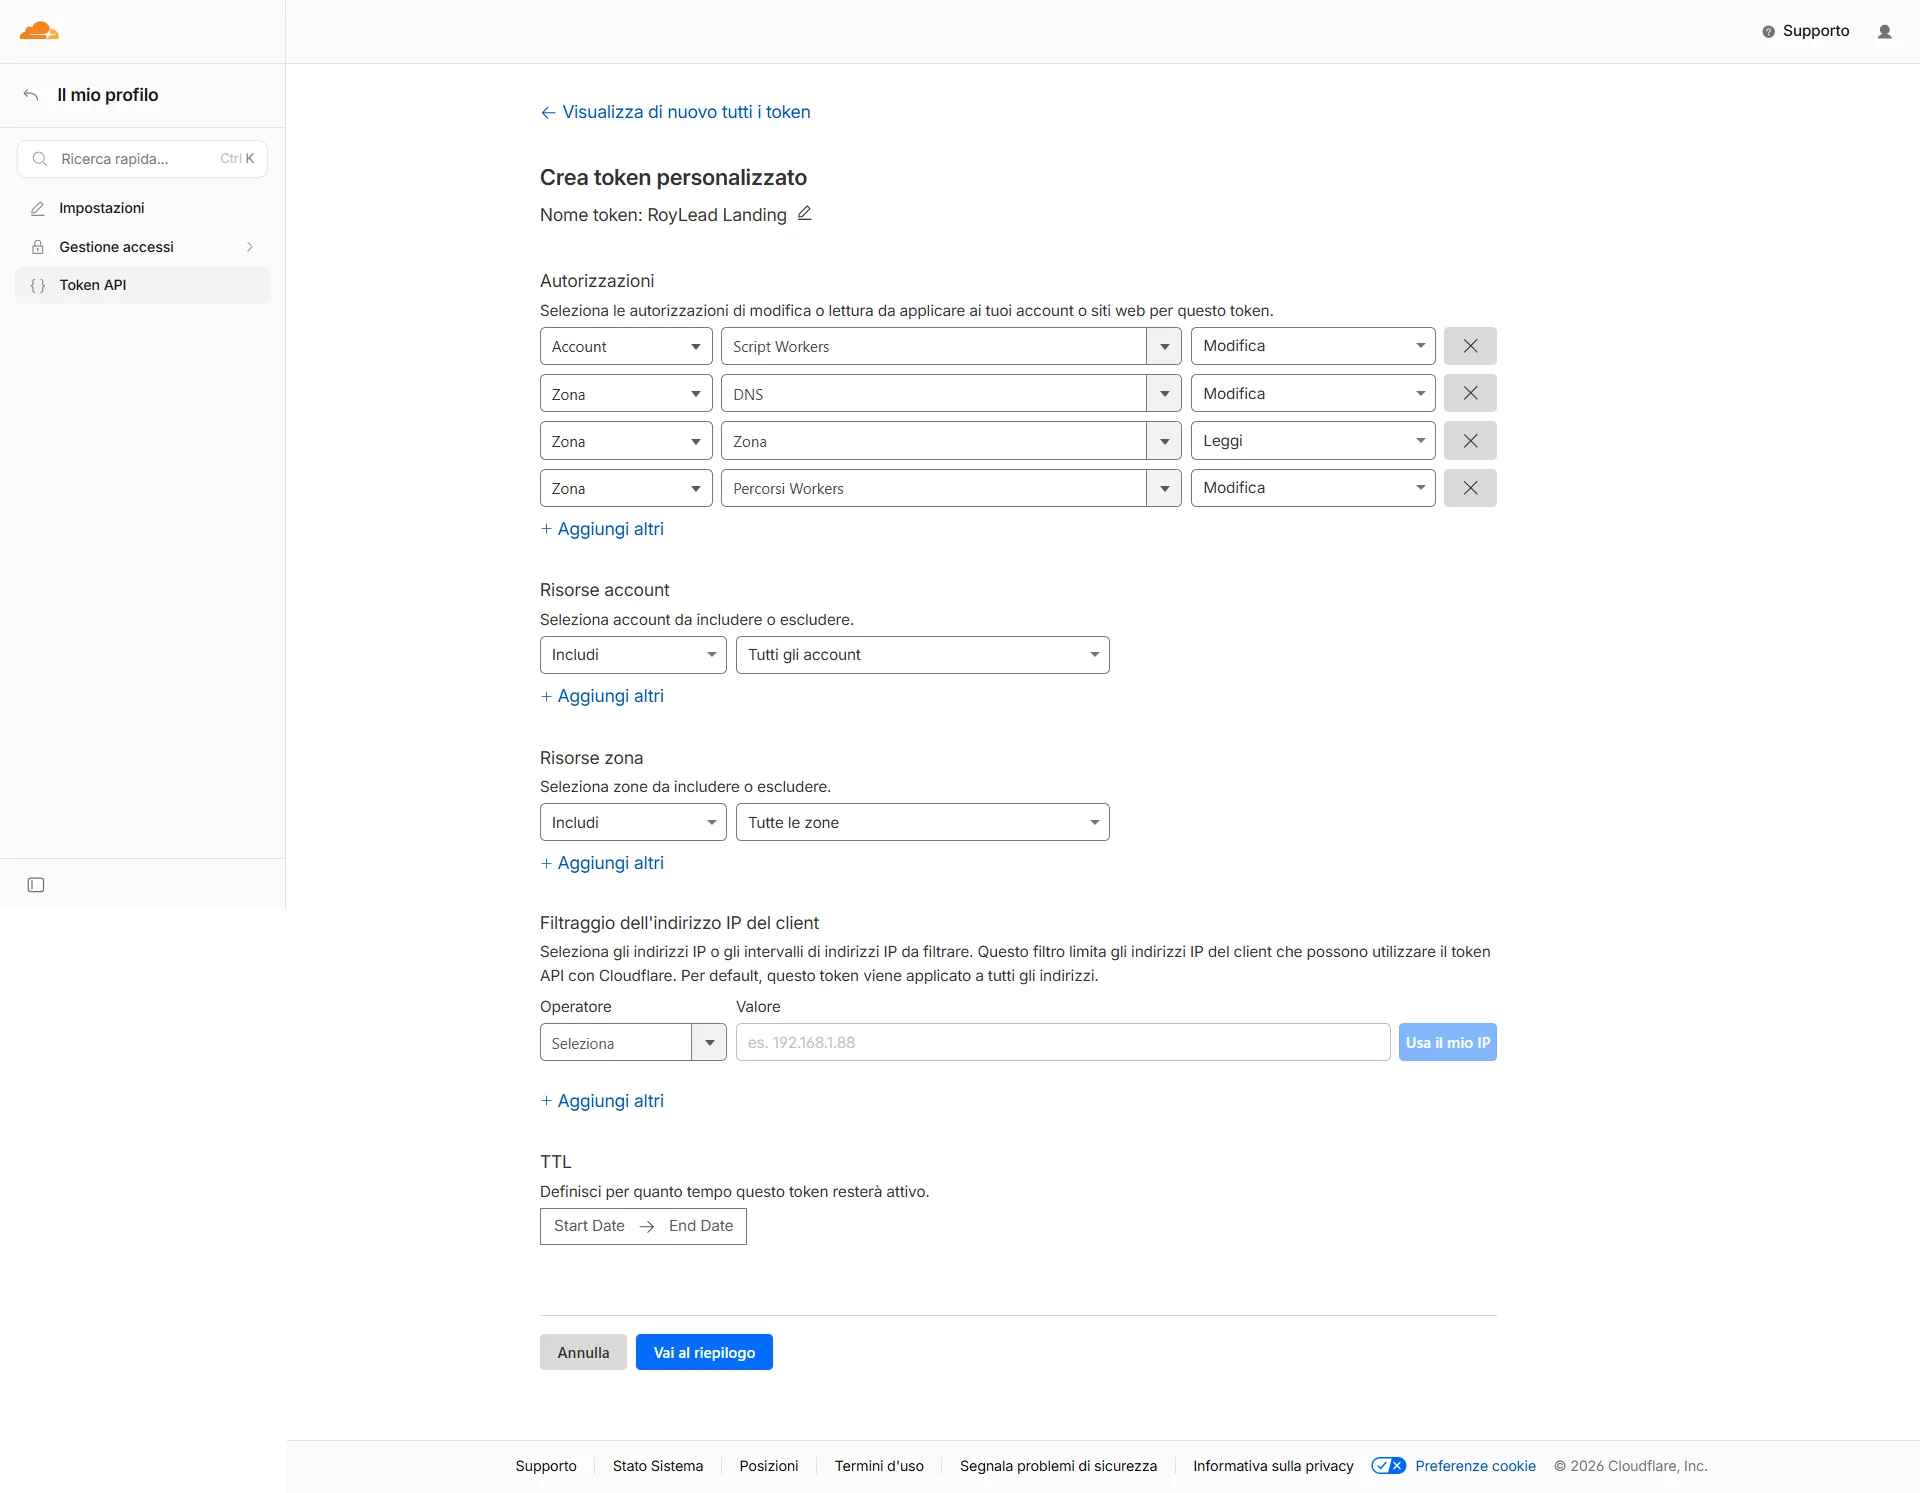
Custom token form with the 4 permissions filled in: Workers Scripts, Workers Routes, DNS, Zone -
Account Resources: Include → All accounts (leave as is).
-
Zone Resources (appears as soon as you add a Zone permission): Include → All zones.
-
Client IP Filtering and TTL: leave them empty.
-
Continue to summary: it must show all 4 permissions —
- All accounts → Workers Scripts:Edit
- All zones → DNS:Edit, Zone:Read, Workers Routes:Edit
Then Create Token → copy the token (shown only once).
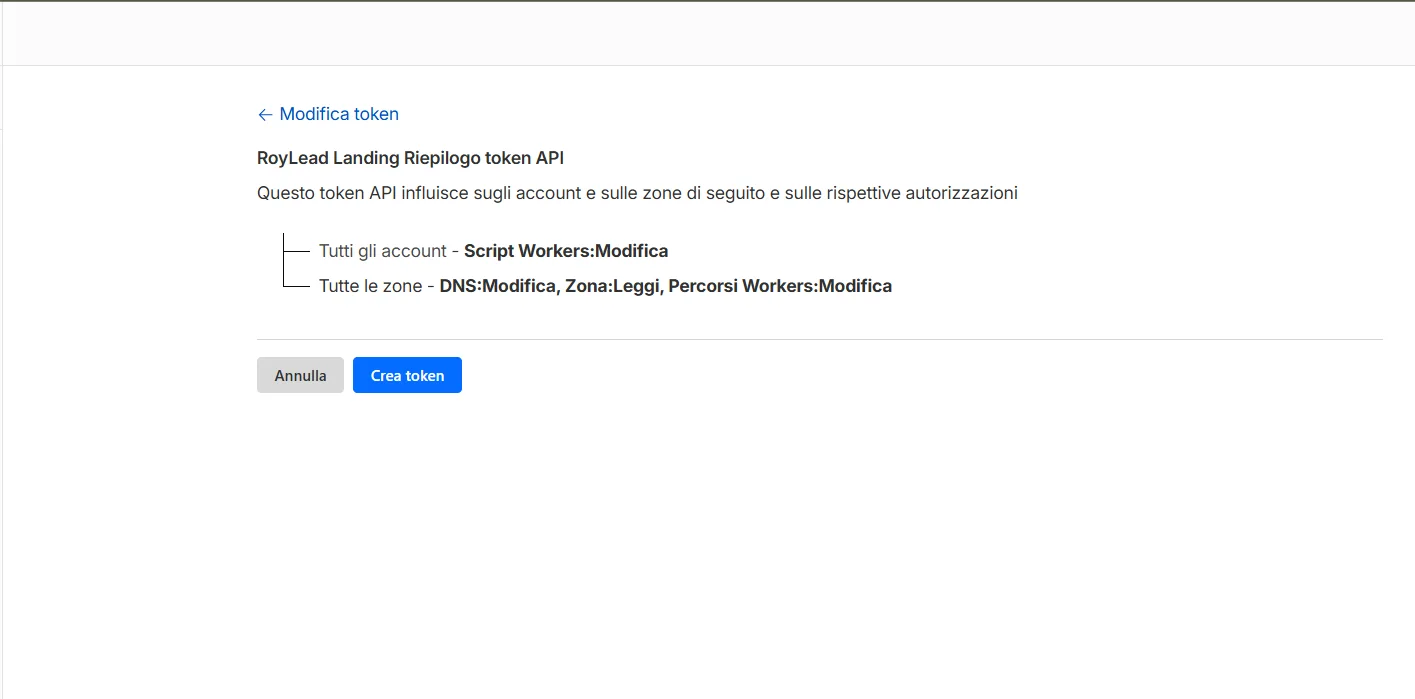
Token API summary with the 4 correct permissions: Workers Scripts, DNS, Zone, Workers Routes
2. In RoyLead — Settings → Cloudflare
Open Or use an API token, paste the API token → Save. (RoyLead derives the Account ID from the token — you don't need to look it up.) When the badge shows Configured (green), you're set.
Publishing
In RoyLead → Landing pages → New landing (editor): pick a name + domain, write the HTML in the editor, then Publish. The landing goes live at yourdomain.com/<path> (the RoyLead tracker is injected automatically). On the first deploy, SSL can take a few minutes.
💡 Notes
- The token is stored encrypted; to rotate it, create a new token on Cloudflare and paste it again.
- The 4 permissions are the minimum: upload the page (Workers Scripts), route the path (Workers Routes), manage DNS, read your domains (Zone).
- With the connection RoyLead never sees your Cloudflare password; access renews by itself and you can revoke it whenever you want.
Ready to put this into practice?
Create your RoyLead account and start in minutes.